Aged Italian Fresco : Colorwash Tuscan Finishing
You don’t have to travel to the historic and artistic-rich Italian cities of Rome and Florence to attain the skill of fresco. The up and coming popular faux finish, colorwashing, will transform any room in your home with the look and feel of an age-old renaissance painting.
Fresco is the art of painting on lime plaster with water-based paints or colors. Colorwashing is the same painting technique, but doesn’t require the application of paints directly onto to lime plaster. The paints and glazes available today are for use directly in your home either on freshly painted drywall / sheetrock or even plaster (for those living in older homes). With colorwashing, you will have one base coat and at least one glaze.
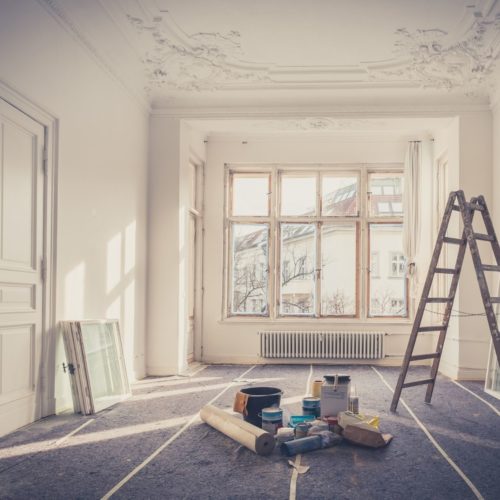
 I began the quest to transform my dining room into an elegant, yet comfortable space for enjoying special holiday meals and occasions with family and friends. The dull, almost institutional color of my walls was unsightly and in desperate need of an uplifting alteration. While browsing the paint aisle at my local home improvement store, I stumbled onto a colorwashing brochure, beautifully depicting the look of aged fresco. I made the decision then and there. This beautiful faux finish was the treatment to soon adorn the lackluster walls of our family dining room.
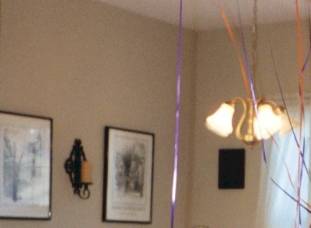
(The streamers on the image above were for a birthday celebration, and not permanently placed.)
Once you determine a color palette for your chosen room, collect several paint chip samples from the paint or home improvement store. (It’s an even better idea to ask the clerk for base coat chip samples for each colorwash finish you select. This will come in handy later!) Once in your home, gather fabric samples and small furniture items such as pillows or small rugs in the room you plan to colorwash. (It’s critical to the color accuracy of your colorwashing project to review paint chip samples at home. The lighting in paint and home improvement stores is considerably different than the lighting in your home.) More about the Tuscan decor.
Your color washing project will require several items:
- Special base coat paint is usually required. This special white-colored base coat usually has less paint volume in order to allow ample space when your paint store adds any tint to the can. (Some base coats may be deeply tinted.)
- You’ll also need at least one glaze, depending on the colorwashing finish you have selected. Be sure to carefully review your colorwash paint chip to determine what glaze color is required for your selected finish
- A special colorwashing brush, with an approximate 4-inch wide bristle area, also will be needed.
- Be sure to grab painters tape (a 14-day painters tape works excellent for this project), several paint trays, trim paintbrushes, paint roller sponges with roller handles and at least one paint drop cloth. (An old bed sheet also works great.)
A special note! If you noticed your existing wall color is darker than the base coat paint chip color for your colorwash finish, you should purchase an ample amount of primer paint to prime the wall area before applying a base coat. Should you choose to skip this step, you will likely wind up with several coats of base paint before beginning the glazing process. (The author is speaking from experience!)
 Before painting, use painter’s tape to mask trim, baseboards and the ceiling. Apply the first coat of your colorwash base coat as you would any other paint. Allow the first coat of paint to dry for at least 24 hours. Follow the first coat with a second and final coat. Allow the second and final coat of paint to dry for at least 24 hours. Do not remove the painter’s tape.
Right: closeup of the colorwashing done on a dining room.
Once the base coats have thoroughly dried, you’re ready to begin glazing. Using the 4-inch wide colorwashing brush, lightly dip the brush into the glaze, removing any excess. Beginning in the top most corner of the room (working left to right, or right to left), paint an “X” approximately 12 to 16-inches in diameter. Remaining in the same 12 to 16-inch area and without re-dipping the brush, repeat the “X” pattern until the area is completely smooth and even. To maintain a consistent and light look, use paper towels to dry out the colorwash brush between glaze applications. This technique will produce a “softer” look and feel to your colorwash.

So there’s the good news. Are you waiting for the bad news? Well, unfortunately there is. Ok, maybe just a little. Colorwashing is a very delicate technique. Don’t hesitate to ask the family to chip in and help with the base coat, but when it comes time to glaze, and speaking from experience, it’s best as a one person job. My husband was eager to jump in and help me colorwash, but our techniques were vastly different, ultimately producing completely different finishes. (Fortunately, I was able to correct his work.) And finally, if at all possible, try to complete the entire room, one glaze color at a time, within the same day. Believe it or not, if you wait until the next day or next weekend to drag in the ladder and paint scaffold to finish the upper wall area near the ceiling, you will more than likely notice a difference in the finish.
Oh, and another thing. Colorwashing certainly is not a one-day or weekend project. The glazing process can be tiresome and almost back breaking (think about painting an “X” over and over and over again… your shoulders will remind you to stop and take a break). But I will make you one very important promise. When you step back and look at the beautiful colorwash finish on your wall, you might think of yourself as a Michelangelo-inspired painter, ready to tackle the Renaissance art of fresco.
By Melissa A. Tyson